Welcome to customize all kinds of clothing
How to Cut T-Shirts into Tank Tops: Easy DIY Guide (2026)
Looking to refresh your wardrobe without spending money? Learning how to cut t-shirts into tank tops is a simple, budget-friendly DIY project that lets you repurpose old tees into stylish, custom loungewear or summer staples. Whether your t-shirts are faded, ill-fitting, or just in need of a makeover, transforming them into tank tops requires minimal tools, no sewing skills, and takes less than 30 minutes. This guide breaks down step-by-step instructions, style variations, pro tips, and common mistakes to avoid— all tailored to help you create perfectly fitted, on-trend tank tops that rival store-bought options. Plus, we’ll cover riendly insights for anyone looking to master this DIY hack in 2026.
Why Cut T-Shirts into Tank Tops? Benefits of This DIY Hack
Before diving into the cutting process, let’s explore why turning old tees into tank tops is a smart choice for fashion lovers and budget shoppers alike:
- Budget-Friendly Wardrobe Refresh: No need to buy new tank tops— repurpose tees you already own, saving money while updating your style.
- Custom Fit & Style: Store-bought tank tops often lack a perfect fit, but cutting your own lets you adjust neckline, armholes, and length to match your body type and preferences.
- Sustainable Fashion: Reduce textile waste by repurposing old clothing instead of throwing it away— a eco-friendly choice that aligns with 2026’s sustainable style trends.
- Versatility: Turn plain tees into casual loungewear, workout tanks, beach cover-ups, or trendy streetwear pieces— the possibilities are endless.
- No Sewing Required: This DIY project is beginner-friendly, with no sewing skills or equipment needed. All you need is a pair of scissors and a little creativity.
Whether you’re a DIY novice or a seasoned crafter, learning how to cut t-shirts into tank tops is a skill that will elevate your wardrobe and reduce your environmental footprint.
Tools You’ll Need (Beginner-Friendly)
The best part about this DIY project is that you only need a few basic tools— most of which you probably already have at home. Here’s what to gather before you start cutting:
- An Old T-Shirt: Choose a tee that’s clean, in good condition (no holes or tears in the areas you’ll keep), and made of a fabric that holds its shape (cotton or cotton blends work best). Avoid stretchy fabrics like spandex if you want a more structured tank top.
- Sharp Scissors: Use fabric scissors (preferred) or sharp household scissors. Dull scissors will fray the fabric and make clean cuts difficult.
- Chalk or Fabric Marker: For tracing cut lines— this ensures straight, even cuts. If you don’t have fabric marker, a piece of soap or a white crayon works in a pinch.
- A Flat Surface: A table or floor where you can lay the t-shirt flat. Iron the tee first to remove wrinkles, which will help you make accurate cuts.
- Pins (Optional): For securing the t-shirt in place while cutting, especially if you’re new to DIY or want extra precision.
- Sandpaper (Optional): For fraying the edges of your tank top (if you want a distressed look).
That’s it! No fancy equipment— just these basic tools to create a custom tank top.
Step-by-Step Guide: How to Cut T-Shirts into Tank Tops (Basic Style)
This step-by-step tutorial covers the basic method for turning a t-shirt into a classic tank top. It’s perfect for beginners and works for both men’s and women’s tees. Adjust the measurements based on your desired fit and style.
Step 1: Prep the T-Shirt
Start by washing and drying the t-shirt to remove any dirt or shrinkage (this ensures the tank top won’t change shape after cutting). Lay the tee flat on a clean, flat surface, front side up. Smooth out any wrinkles with your hands or an iron— wrinkles can cause uneven cuts, so this step is crucial.
If you want a symmetrical tank top, fold the t-shirt in half vertically (left side over right side), aligning the sleeves and hem. This way, you’ll only need to cut one side, and the other side will mirror it perfectly. Secure the folded tee with pins if needed.
Step 2: Mark the Neckline
Decide on the neckline style for your tank top— popular options include crew neck, V-neck, scoop neck, or off-the-shoulder. Use chalk or fabric marker to trace the neckline on the folded tee:
- Crew Neck: Trace a curved line from the top of one shoulder to the top of the other, following the original neckline but widening it slightly (1-2 inches) to create a tank-style neck.
- V-Neck: Trace a V shape from the top of one shoulder to the center of the chest, then back up to the top of the other shoulder. Adjust the depth of the V based on your preference (deeper V for a more daring look).
- Scoop Neck: Trace a deep curve from shoulder to shoulder, dipping lower in the center (2-3 inches below the original neckline) for a feminine, relaxed look.
Pro tip: Start with a smaller cut— you can always widen the neckline later, but you can’t add fabric back once it’s cut!
Step 3: Cut the Neckline
Once you’ve marked the neckline, carefully cut along the traced line with sharp scissors. If the tee is folded, cut through both layers of fabric to ensure symmetry. After cutting, unfold the tee and check the neckline— adjust if needed by trimming small amounts of fabric at a time.
To prevent fraying, you can fold the raw edge of the neckline under ½ inch and iron it (no sewing required) or use fabric glue to seal the edge. For a distressed look, skip this step and let the edges fray naturally.
Step 4: Mark and Cut the Armholes
Next, mark the armholes. For a classic tank top, the armholes should start at the bottom of the neckline (where you just cut) and extend down to the underarm of the original t-shirt. Trace a curved line from the shoulder (end of the neckline cut) to the underarm, keeping the curve smooth and even.
If you want a more relaxed fit, widen the armholes slightly (1 inch on each side). For a fitted look, keep the armholes closer to the original sleeve seam. Once marked, cut along the traced line through both layers of fabric (if folded). Unfold the tee and check the armholes— make sure they’re symmetrical and comfortable (you should be able to move your arms freely without the fabric pulling).
Step 5: Cut the Sleeves (and Extra Fabric)
After cutting the armholes, the sleeves of the original t-shirt will be loose— remove them by cutting along the edge of the armhole (the line you just cut). Discard the sleeves or save them for other DIY projects (like hair scrunchies or patchwork).
If the original t-shirt has a lot of fabric around the torso, you can trim the sides to create a more fitted look. Mark a straight line from the bottom of the armhole down to the hem, tapering slightly toward the waist if desired. Cut along the line through both layers of fabric, then check the fit.
Step 6: Adjust the Length (Optional)
If you want a cropped tank top or need to shorten the length, mark the desired length on the hem of the tee (use a ruler for accuracy) and cut along the line. For a distressed hem, cut unevenly or make small slits along the bottom edge. For a clean look, fold the hem under ½ inch and iron it.
Step 7: Finish and Style
Once you’ve completed all the cuts, wash the tank top again (this will soften the edges and remove any chalk or marker residue). Hang it to dry, then style it as desired— pair with jeans, shorts, leggings, or a skirt for a casual, custom look.
2026 Trendy Tank Top Styles to Try (DIY Variations)
Once you master the basic method, experiment with these trendy 2026 styles to take your DIY tank tops to the next level. Each variation uses the same basic cutting steps but adds unique details for a fashion-forward look:
1. Racerback Tank Top
Racerback tanks are perfect for workouts or summer days. To create one: after cutting the neckline and armholes (basic style), fold the tee in half vertically. Mark a curved line from the bottom of the armhole to the center of the back neckline (wider at the armhole, narrower at the neck). Cut along the line, then unfold— the back will have a sleek, racerback shape. For extra style, add a keyhole cutout in the center of the racerback.
2. Distressed Denim-Inspired Tank Top
Distressed styles are still on-trend in 2026. After cutting your basic tank top, use sandpaper to fray the neckline, armholes, and hem. Add small slits or cuts along the sides or front (avoid cutting too deep!) for a worn-in, edgy look. Pair with high-waisted jeans and sneakers for a streetwear vibe.
3. Cropped Tank Top with Tie Front
Cropped tanks are perfect for pairing with high-waisted bottoms. Cut the basic tank top to your desired cropped length (2-3 inches above the waist). Then, cut a 2-inch wide strip from the front hem (from center to side on both sides), creating two ties. Tie the strips in a bow at the front for a cute, feminine touch.
4. Off-the-Shoulder Tank Top
For a romantic, summery look, create an off-the-shoulder tank top. Instead of cutting a traditional neckline, trace a wide, curved line from one shoulder to the other, dipping lower on the shoulders (2-3 inches below the original neckline) to sit off the shoulders. Cut along the line, then fold the raw edge under and iron for a clean finish.
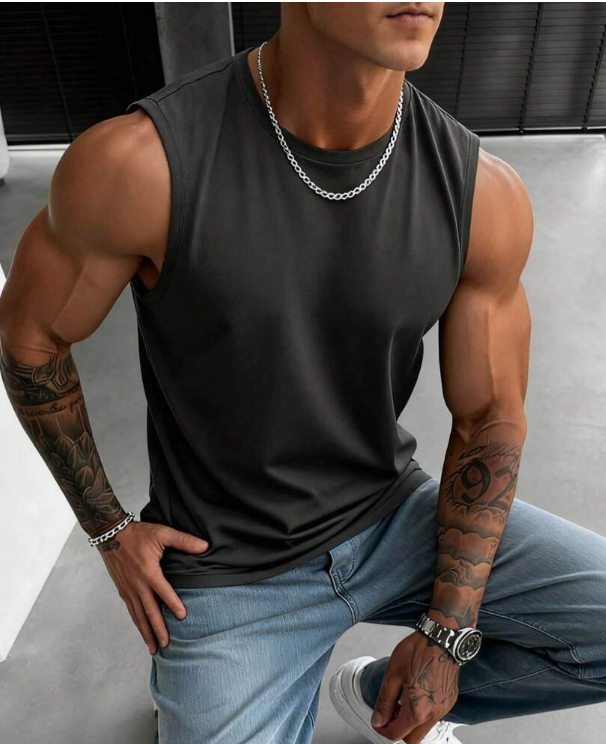
5. Muscle Tank Top (For Men & Women)
Muscle tanks are loose-fitting with wide armholes, perfect for casual wear. To make one: widen the armholes significantly (cut 2-3 inches past the original underarm) and keep the neckline simple (crew or scoop neck). Trim the sides of the tee to create a boxy, relaxed fit— ideal for layering or wearing alone.
Pro Tips for Cutting T-Shirts into Tank Tops (Avoid These Mistakes!)
Even DIY pros make mistakes— here are our top tips to ensure your tank top turns out perfectly, plus common errors to avoid:
- Start Small: As mentioned earlier, always cut less fabric than you think you need. You can always trim more later, but you can’t undo a cut that’s too big.
- Use Sharp Scissors: Dull scissors will fray the fabric and make uneven cuts. Invest in a pair of fabric scissors if you plan to do more DIY projects.
- Iron First: Wrinkles cause uneven cuts— always iron the t-shirt before you start marking and cutting.
- Test the Fit As You Go: After each cut (neckline, armholes), try on the tee to check the fit. This allows you to adjust before making more cuts.
- Avoid Stretchy Fabrics: Stretchy tees (like those with spandex) are harder to cut and may lose their shape. Stick to cotton or cotton blends for best results.
- Don’t Rush: Take your time when cutting— slow, steady cuts are more accurate than quick, sloppy ones.
How to Care for Your DIY Tank Tops
To keep your custom tank tops looking great for years, follow these care tips:
- Wash Cold: Wash your tank top in cold water (machine or hand wash) to prevent fraying and fading.
- Hang to Dry: Avoid putting DIY tank tops in the dryer— the heat can shrink the fabric and worsen fraying. Hang them to dry instead.
- Avoid Bleach: Bleach will weaken the fabric and cause the edges to fray more quickly.
- Trim Frayed Edges: If the edges start to fray too much, trim them with sharp scissors to keep the tank top looking neat.
FAQs About Cutting T-Shirts into Tank Tops
Here are answers to the most common questions about this DIY project— perfect for beginners or anyone looking to troubleshoot:
Q: Do I need sewing skills to cut a t-shirt into a tank top?
A: No! This DIY project requires no sewing skills. You can seal the edges with fabric glue or iron them under for a clean look, but even that is optional— many people prefer the raw, casual edge of a no-sew tank top.
Q: What type of t-shirt works best?
A: Cotton or cotton-blend t-shirts work best. They hold their shape well, are easy to cut, and fray gently (if you want a distressed look). Avoid stretchy fabrics like spandex or polyester, as they’re harder to cut and may lose their shape.
Q: Can I cut a graphic t-shirt into a tank top?
A: Yes! Graphic tees are perfect for this DIY. Just make sure to position the graphic where you want it (e.g., center front) before cutting. Avoid cutting through the graphic unless you want a distressed look.
Q: How do I make sure the tank top is symmetrical?
A: Fold the t-shirt in half vertically (left side over right side) before cutting. This ensures that both sides are identical. Use pins to secure the folded tee in place, and trace your cut lines on one side— cutting through both layers will give you a symmetrical tank top.
Q: Can I make a tank top from a long-sleeve t-shirt?
A: Absolutely! For a long-sleeve tee, first cut off the sleeves (cut along the seam from shoulder to underarm), then follow the same steps for cutting the neckline and armholes. You can also cut the long sleeves into short sleeves or use them for other DIY projects.
Final Thoughts: Elevate Your Wardrobe with DIY Tank Tops
Learning how to cut t-shirts into tank tops is a fun, easy, and sustainable way to refresh your wardrobe in 2026. With minimal tools and no sewing skills, you can transform old tees into custom tank tops that fit perfectly and reflect your personal style. Whether you prefer classic crew necks, trendy racerbacks, or distressed styles, the possibilities are endless— and the best part is, each tank top will be unique to you.
So grab an old t-shirt, a pair of scissors, and get creative! With this guide, you’ll be making stylish DIY tank tops in no time— perfect for summer, workouts, or everyday wear. Remember to start small, take your time, and have fun with the process— the results will be worth it.
Explore More Articles from WUYI Apparel
Want to learn more about styling essentials hoodies or other apparel tips? Check out some of our other helpful articles:
- Wearing Black to a Wedding: A Modern Etiquette Guide
- Rainwear Jackets: The Perfect Fusion of Fashion and Function
- How To Measure Clothes
- Casual clothing – Casual and elegant through everyday life
- How to Find Your Style:An in-depth exploration of one’s own clothing style
For more tips and tricks on fashion and lifestyle, don’t forget to visit our Blog Section.
Head over to our Shop Page to browse our full collection and pick your favorite essentials hoodie today!